| Lorenzo's Progress Log |
This is where I keep track of my sewing projects. Feel free to email me with any comments or questions.
- accessories - 6
- black - 27
- children - 1
- cioppa - 1
- cop - 8
- flemish - 34
- man - 14
- woman - 20
- giornea - 1
- italian - 4
- middle - 21
- misc - 9
- old - 1
- red - 4
- red_doublet - 1
- silver - 4
- tailor - 17

| May 21, 2006 |
| New Projects | |
|
I've been much busier in the last six months than this blog would suggest. I've been updating more regularly on my livejournal, mainly because it's easier to update. I'll do a recap here for those people who might still be checking this site.
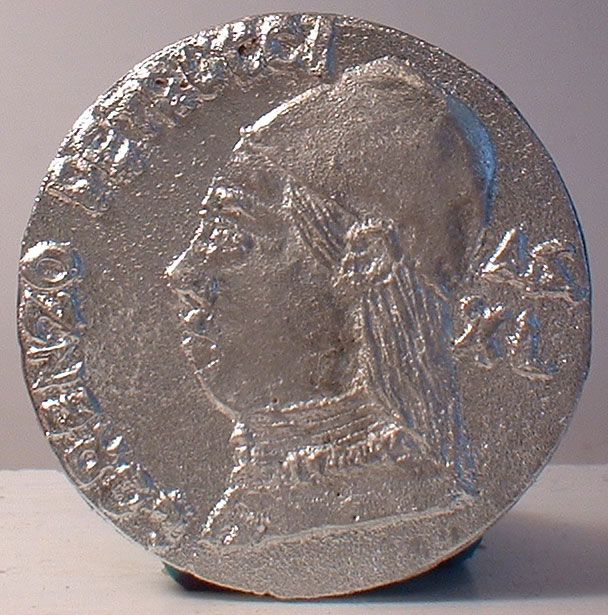
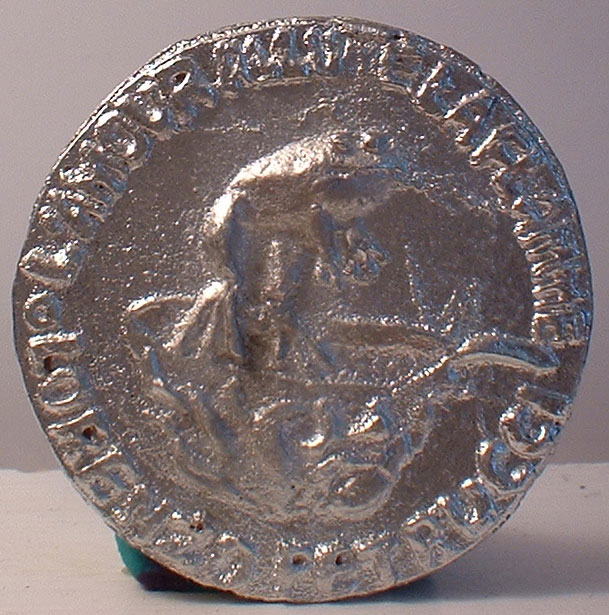
Name Change After more than 12 years in the SCA, I finally decided it was time for a new name that reflected my primary field of interest. Lorenzo Petrucci is a citizen of the Republic of Siena sometime in the latter half of the 15th century. I've been doing a lot of research on Siena lately to flesh out my new persona. During those times when I feel the need to do 16th century clothes, I will simply become my own great-grandson, who happens to have the same name. Clothes I've been working on filling out my 15th century Italian wardrobe. The ultimate goal is to have enough clothes to do a week-long war. I'm getting close to that now, though I'd still like a few more pieces, especially outer garments.
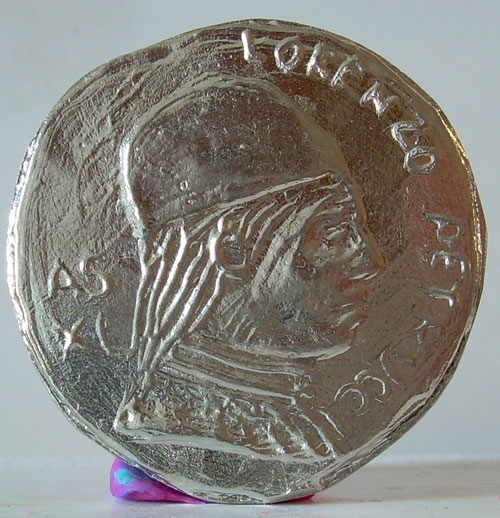
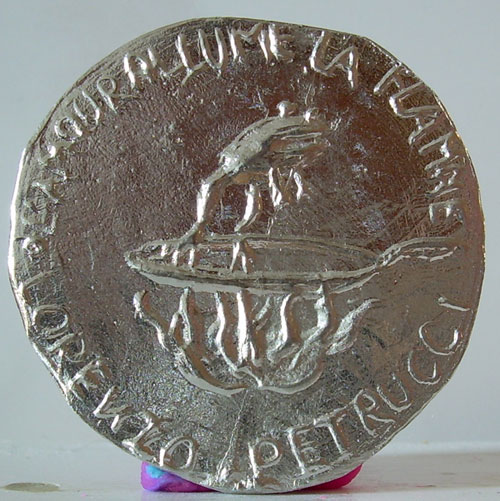
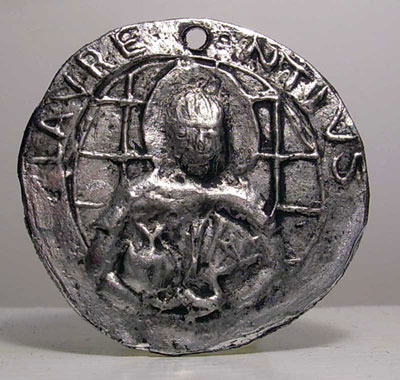
I've got plans for an ostentatious cioppa in the near future, and also a set of low-class grubby clothes to wear when I'm working in the kitchen or when it's too hot to get all the way dressed up. I've already got an old unpleated linen giornea that would be perfect for the latter outfit; I just need a light doublet and hose to go with it. Library I ended up using the book I made back in December as a tailor's manual. I decided to make some more books and give them out to other artisans, to eventually be completed and sent back to form a library of hand-bound, hand-written books on period crafts in a period voice. To date, I have distributed 22 books (including my own), though I have yet to receive any back. In the meantime, I built a carved wooden casket to hold them. It was my first wood carving project, and was a lot of fun to build. Casting I started tinkering with casting recently. My first project was a portrait medal to commemorate my name change.
|
|
| category: /italian | permanent link | |
| Dec 05, 2005 |
| Leather Bound Book | |
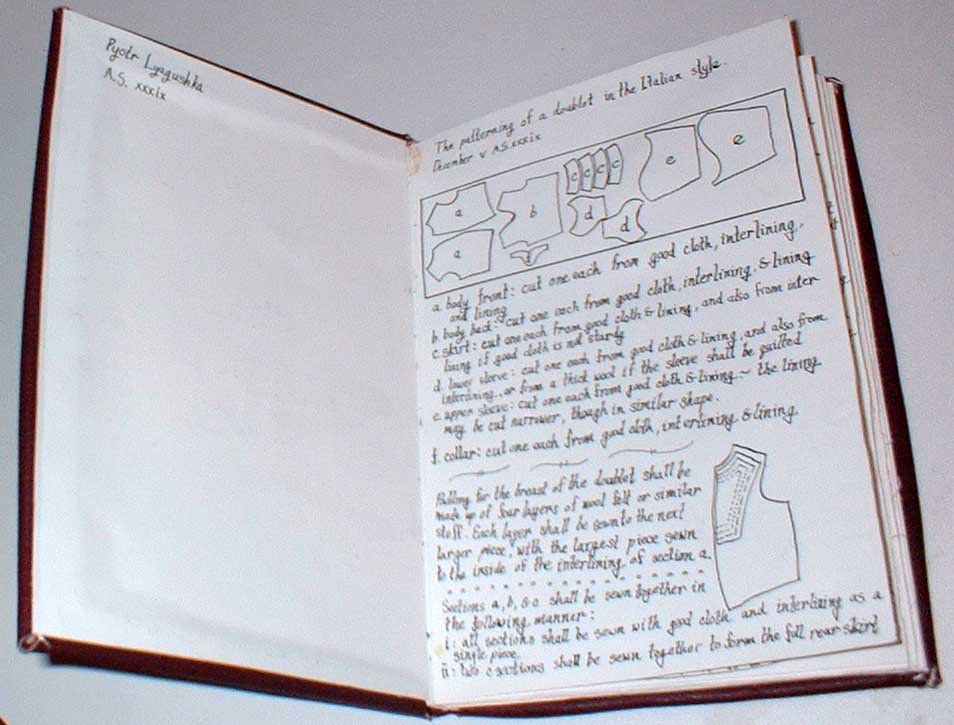
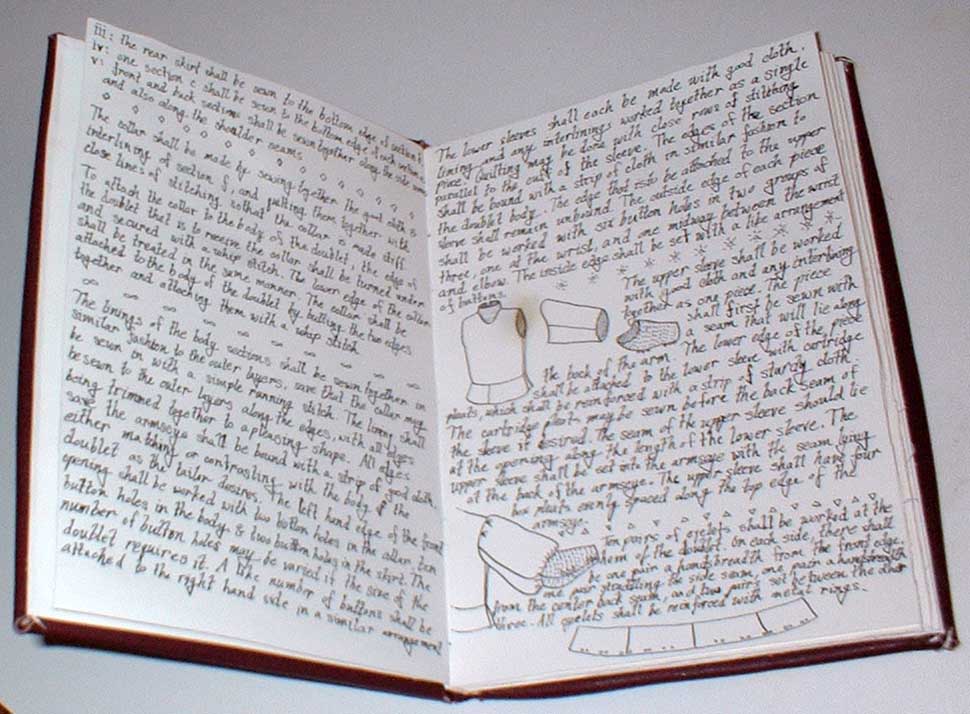
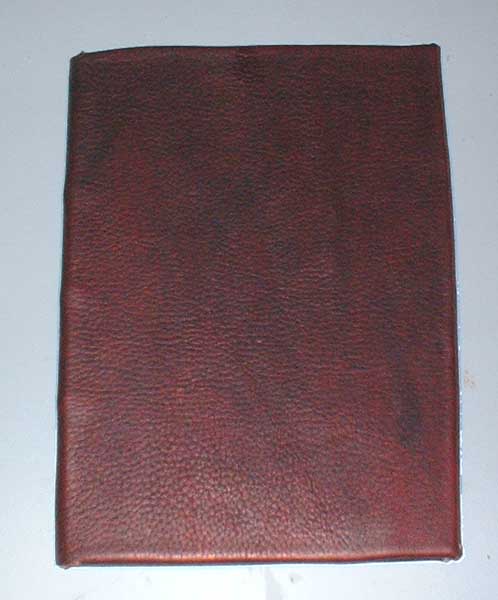 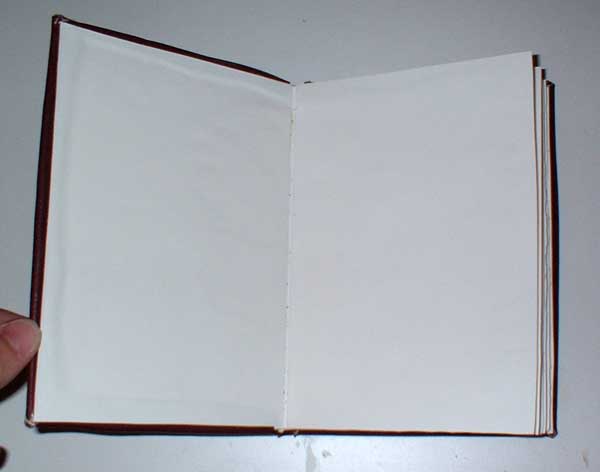 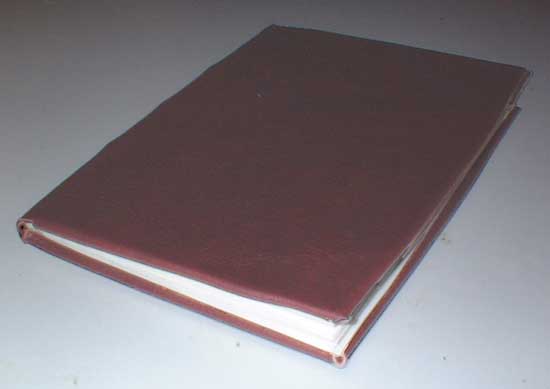 This is a blank book made as an experiment. It measures roughly 5" x 7". The pages and flyleaves are a heavy art paper that I have a huge box of; its exact nature is unknown. The cover boards are made of cardboard covered with 4 oz. leather. The three sections are sewn onto cords of common twine. The spine is reinforced with strips of linen, and everything was glued together with wood glue. The sections are sewn together with silk thread. This is a blank book made as an experiment. It measures roughly 5" x 7". The pages and flyleaves are a heavy art paper that I have a huge box of; its exact nature is unknown. The cover boards are made of cardboard covered with 4 oz. leather. The three sections are sewn onto cords of common twine. The spine is reinforced with strips of linen, and everything was glued together with wood glue. The sections are sewn together with silk thread.The first and last pages ended up getting glued to the covers, which was not my original intent. In the future I would add another leaf when binding to attach to the covers. I would also use a thinner leather. |
|
| category: /accessories | permanent link | |
| Sack Hat | |
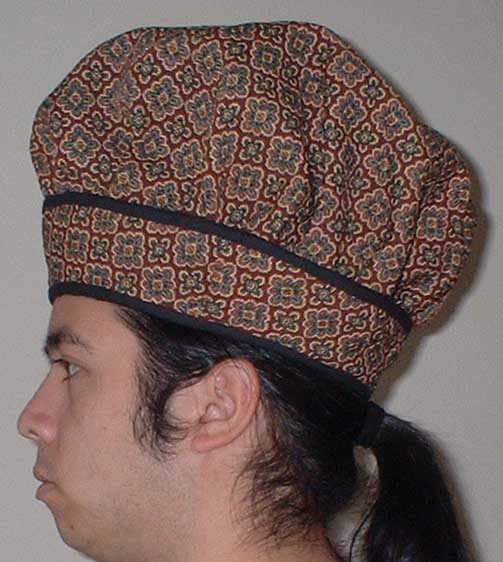 I felt the need for a ridiculous hat this past weekend, so I used up a piece of brocade I had lying around for this. I was able to put two other hats and a box with my button making supplies inside and it still fit fine. I felt the need for a ridiculous hat this past weekend, so I used up a piece of brocade I had lying around for this. I was able to put two other hats and a box with my button making supplies inside and it still fit fine.
|
|
| category: /italian | permanent link | |
| Nov 25, 2005 |
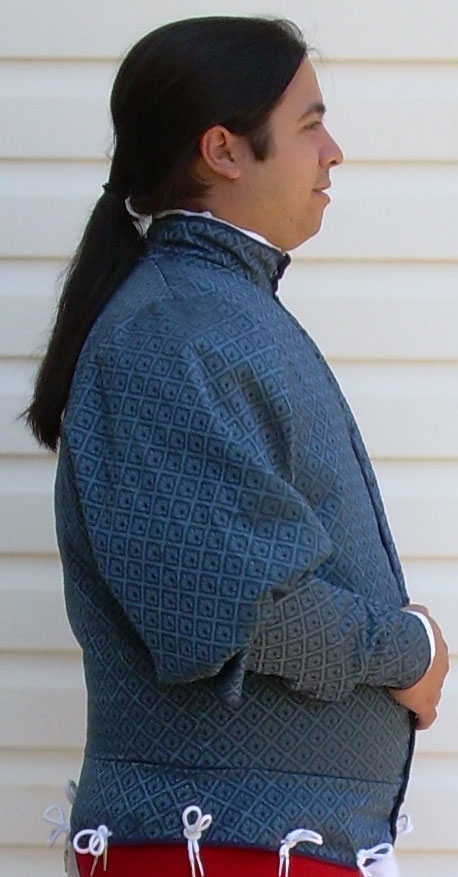
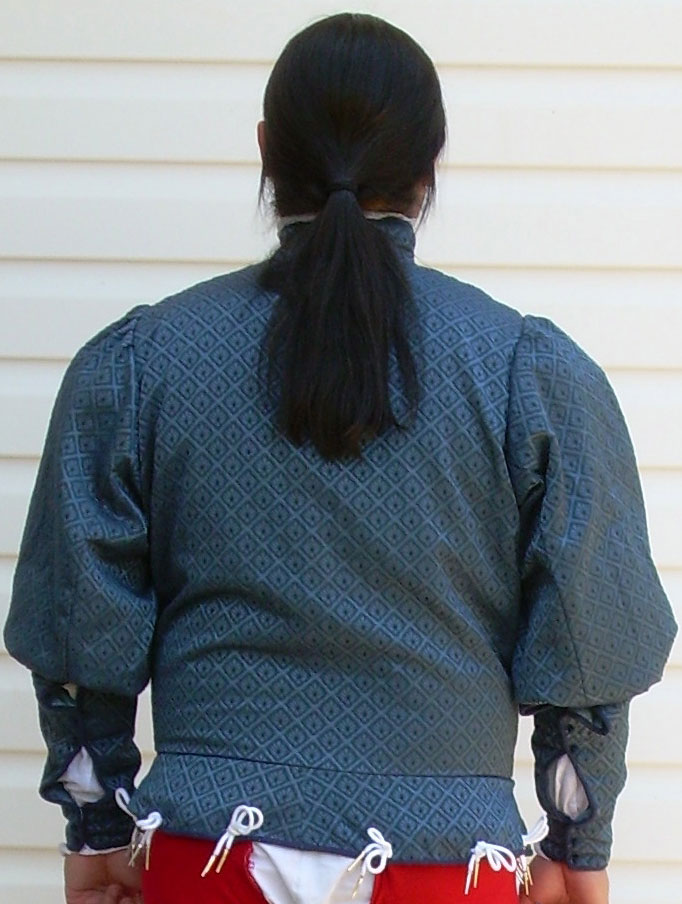
| Silver Doublet | |
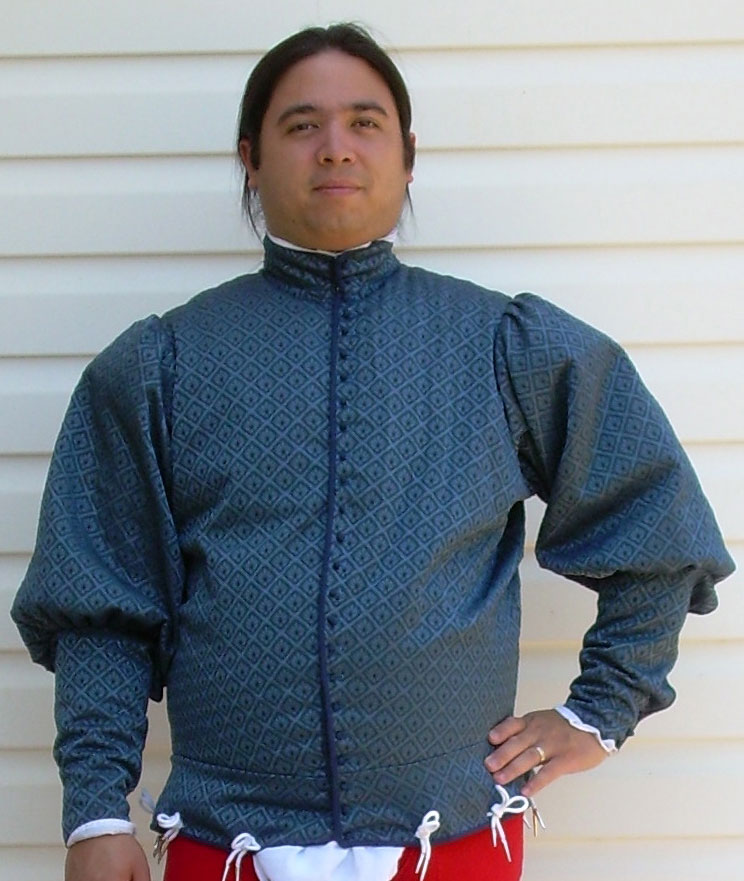
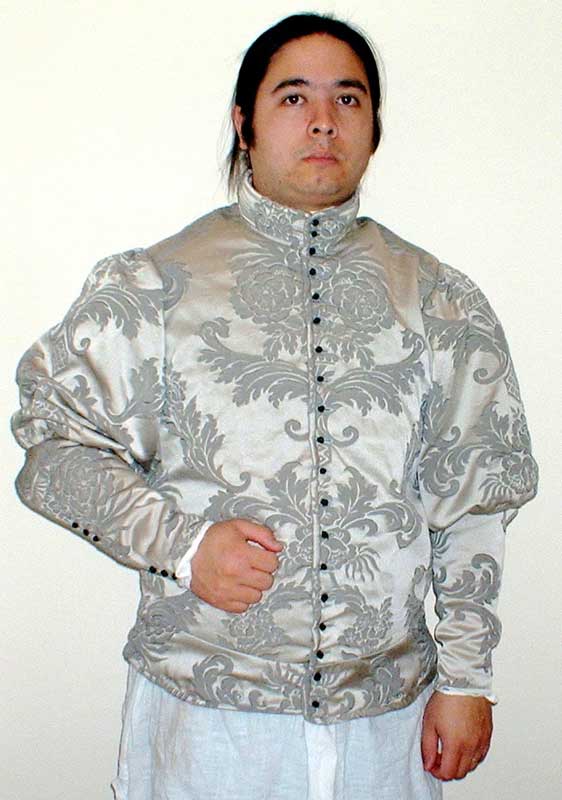  I've had this fabric tucked away for so long that I have no Idea where it came from. There was just enough to make this doublet with maybe a third of a yard left over. It's the same basic pattern as the recent red doublet, except with fewer layers of interlining and only a few layers of felt padding in the chest. It's a shame that most of this doublet will be hidden under outer garments and never be seen. I've had this fabric tucked away for so long that I have no Idea where it came from. There was just enough to make this doublet with maybe a third of a yard left over. It's the same basic pattern as the recent red doublet, except with fewer layers of interlining and only a few layers of felt padding in the chest. It's a shame that most of this doublet will be hidden under outer garments and never be seen.
|
|
| category: /italian | permanent link | |
| Nov 20, 2005 |
| A Green Cioppa | |
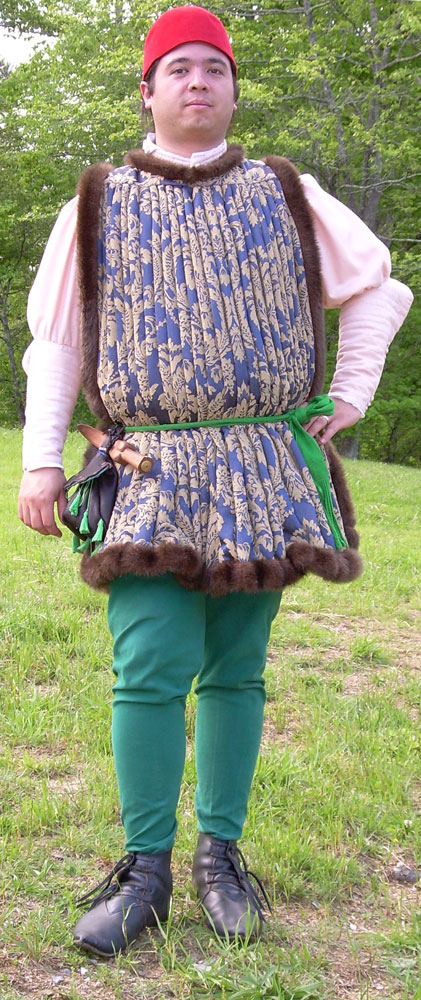
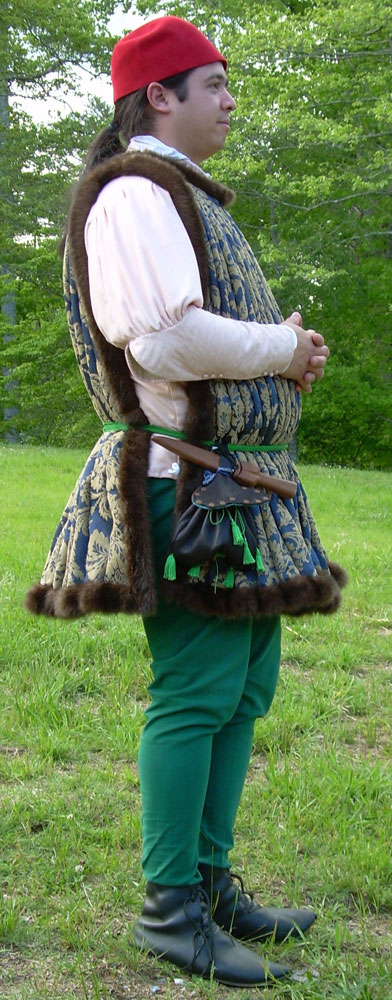
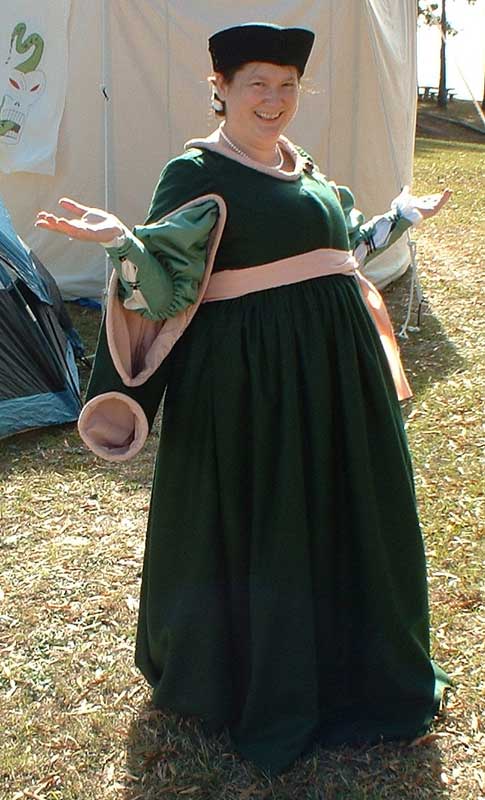 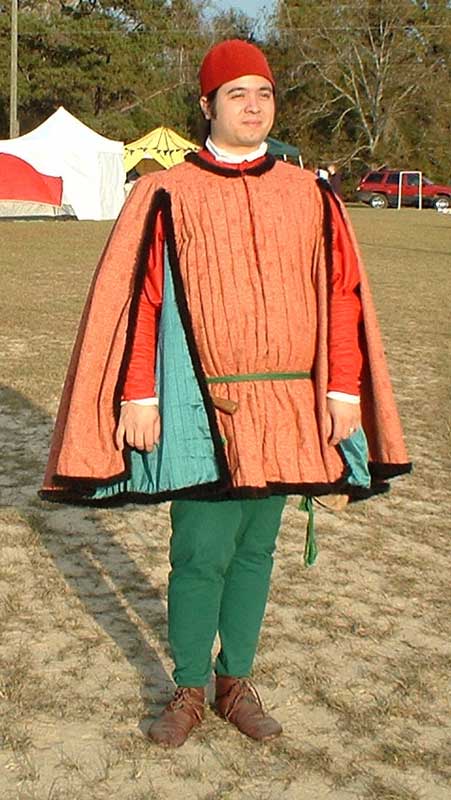 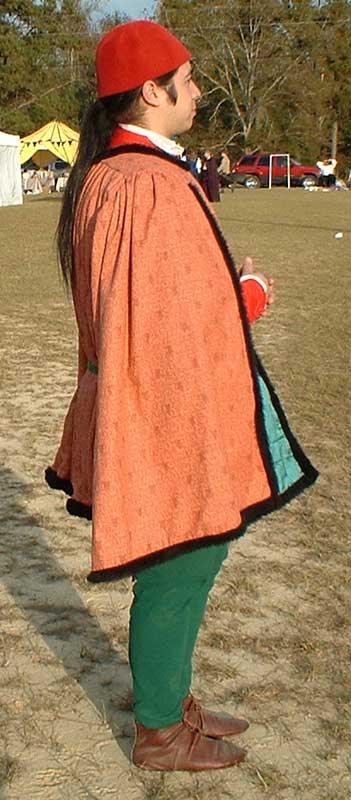 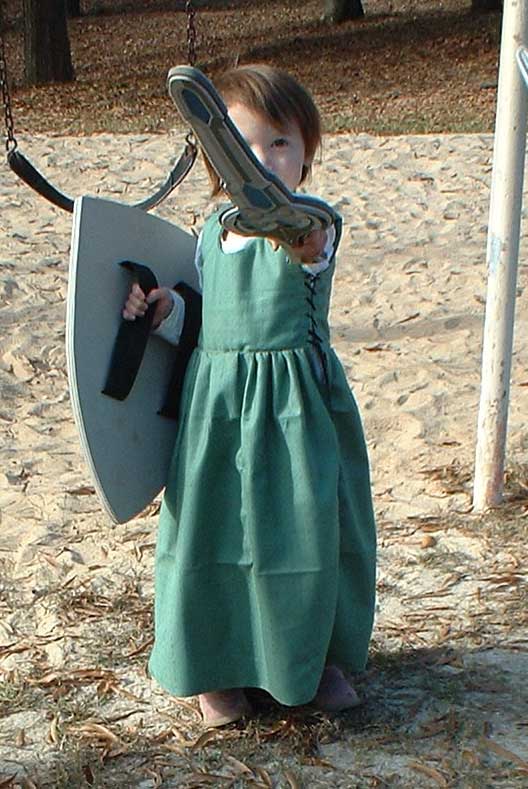 For our seventh anniversary (which is actually tomorrow) I made my wife a cioppa out of the last of my heavy green wool. I based it on portaits by Pisanello, Uccello, and Lippi. At first, I assumed that the trim on these gowns was fur, but the Pisanello portrait is clearly some sort of fabric. I constructed my trim by binding the edges with a strip about three inches wide, backed with quilt batting, and rolled tightly before stitching it to the inside of the openings. The resulting stiff roll does a very good job of keeping the neckline and sleeve openings smooth and round. The skirt is catridge pleated onto the bodice, a few inches higher than the waistline of the black gamurra underneath. For our seventh anniversary (which is actually tomorrow) I made my wife a cioppa out of the last of my heavy green wool. I based it on portaits by Pisanello, Uccello, and Lippi. At first, I assumed that the trim on these gowns was fur, but the Pisanello portrait is clearly some sort of fabric. I constructed my trim by binding the edges with a strip about three inches wide, backed with quilt batting, and rolled tightly before stitching it to the inside of the openings. The resulting stiff roll does a very good job of keeping the neckline and sleeve openings smooth and round. The skirt is catridge pleated onto the bodice, a few inches higher than the waistline of the black gamurra underneath.The sleeves are my favorites that I\'ve done in this style. I attached the upper sleeves to the lower sleeves with felt-backed cartridge pleats, and box pleated the sleeve head into a band at the top. The lining of the upper sleeve is much narrower than the outer shell, and is hand-gathered into both openings. The lower sleeve is ladder laced with long, narrow ribbons with the ends tucked up into the sleeves. Three pairs of ribbons are stitched to the top of each sleeve head, and a piece of ribbon is stitched to the inside of each gamurra strap with corresponding loops to tie the sleeves onto. The other pictures in this entry are also from the event this weekend: a couple pictures of all my new bits and pieces worn together, and my daughter in her new green dress, ready to take over the world. |
|
| category: /italian | permanent link | |
| Nov 06, 2005 |
| A Red Italian Doublet | |
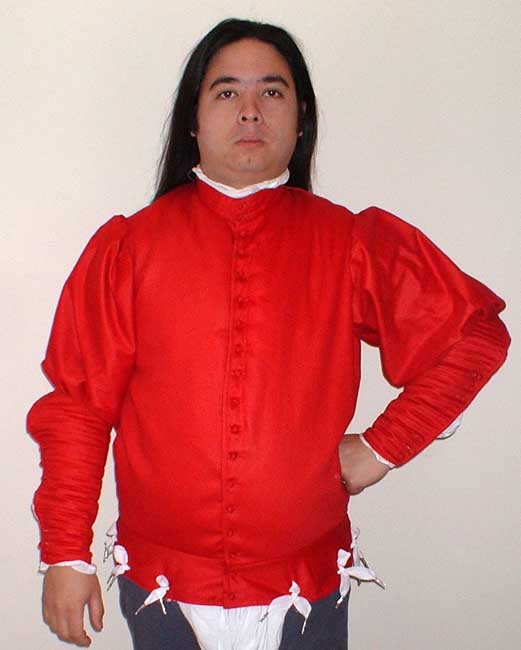 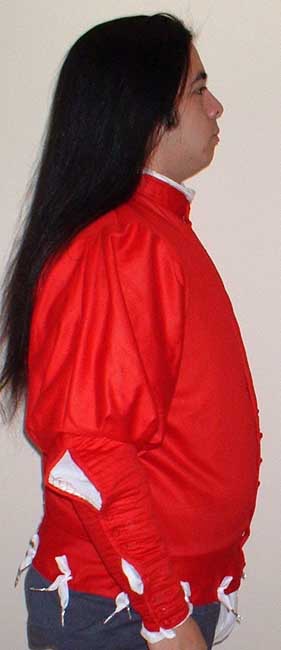 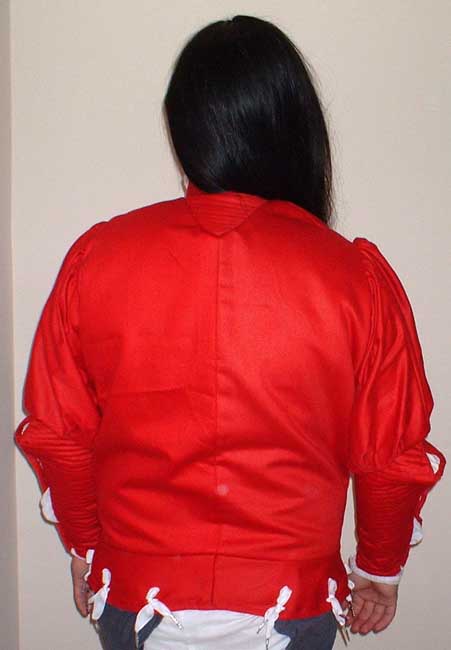 I decided that it was time to update my doublet pattern. I found a good page on farsetto construction a while back, and put many of the ideas there to use in building this one. It's been a while since I started it, so I don't remember exactly what layers are involved in the body of the doublet, but there are many, as well a large padded area in the central chest area. The lower sleeves are quilted with a layer of quilt batting in the middle. The upper sleeves are completely unlined, though I think they could use a little more substance. The collar is also quilted, both with coarse wool and quilt batting. The buttons are all simple cloth bag buttons, with the button holes done by machine. The holes at the bottom edge for the hose points are hand worked over metal rings. I've had many points pull through previous doublets, and I wanted to avoid that. All pieces of the doublet and lining were constructed flat, then sewn together at the edge and bound with a strip cut on the straight grain. I decided that it was time to update my doublet pattern. I found a good page on farsetto construction a while back, and put many of the ideas there to use in building this one. It's been a while since I started it, so I don't remember exactly what layers are involved in the body of the doublet, but there are many, as well a large padded area in the central chest area. The lower sleeves are quilted with a layer of quilt batting in the middle. The upper sleeves are completely unlined, though I think they could use a little more substance. The collar is also quilted, both with coarse wool and quilt batting. The buttons are all simple cloth bag buttons, with the button holes done by machine. The holes at the bottom edge for the hose points are hand worked over metal rings. I've had many points pull through previous doublets, and I wanted to avoid that. All pieces of the doublet and lining were constructed flat, then sewn together at the edge and bound with a strip cut on the straight grain.Though the look of this doublet is far superior to what I have done before, I worry that it is somewhat over-engineered and will be far too warm to wear when summer rolls around again. I plan to try lightening up the construction a bit with the next one. The next phase of this project will be to make new hose once I lay my hands on some wool appropriate for the task. My old hose all leave something to be desired, and are not cut quite right for this new doublet, which has its lacing holes significantly lower than the old ones. |
|
| category: /red_doublet | permanent link | |
| Nov 04, 2005 |
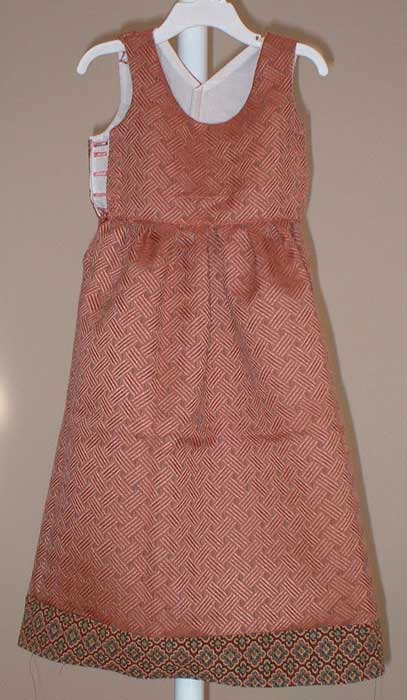
| Orange Dress | |
|
This is a simple dress of fairly generic design. I used machine-sewn buttonholes for lacing holes; not pretty, but not really ugly either. The bodice straps hav an extra three or four inches that can be let out, and I put a half inch tuck in the back to allow for some expansion there. The skirt is a pleated cylinder. It isn't the most exciting shape, but it makes it very easy to add a band to the bottom that can be replaced to allow for growth and/or destruction. I also used this dress to experiment with a techinque for attaching a pleated skirt that was pointed out to me recently. Rather than simply machine sewing the skirt to the bodice (which leaves a pretty bulky seam at the waist, especially with heavier fabrics like this), I finished the bottom edge of the bodice and whip stitched the top edge of the pleats to the very bottom edge of the bodice. It isn't very labor intensive, and it seems to work well. |
|
| category: /children | permanent link | |
| Nov 03, 2005 |
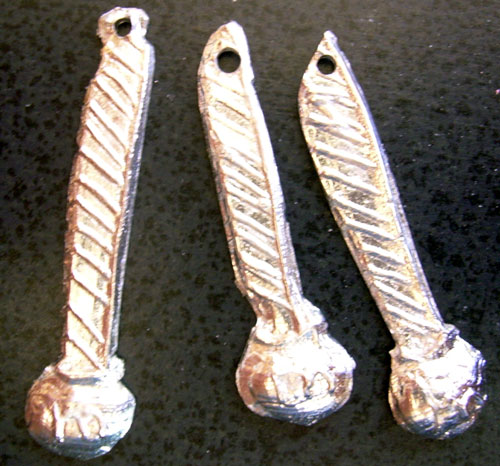
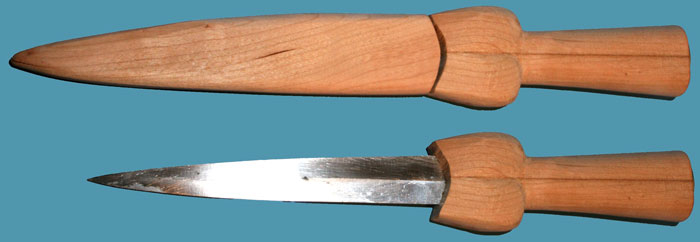
| Ballock Dagger | |
|
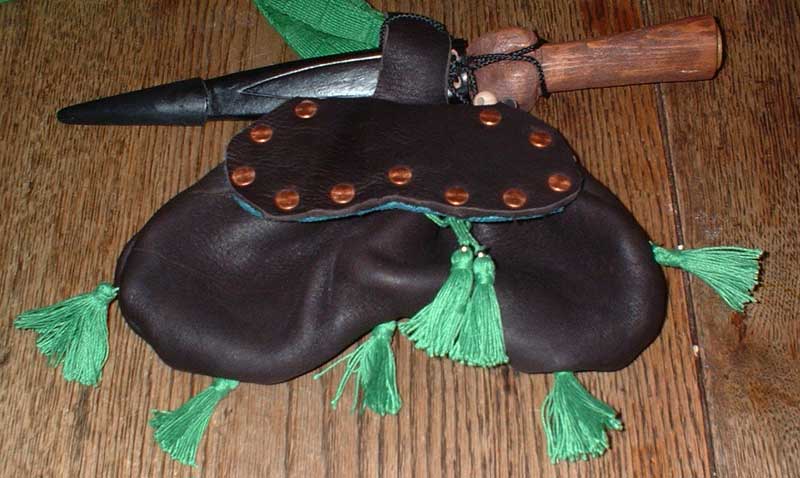
The hilt is made from two pieces of wood glued together. The sheath is made of three pieces, two solid sides and a thin section in the center with a space cut out for the blade. All of this was glued together and then cut and sanded to shape. I'm still not entirely happy with the shape of the hilt, but I'm not really much of a woodworker. The fit of the blade in the sheath started out quite snug, but loosened up after a while. I tried a variety of methods to improve the fit, but ended up just putting a little duct tape on the inside of the sheath, which did the trick. |
|
| category: /accessories | permanent link | |
| Oct 31, 2005 |
| Pouch Tassels | |
| Added lucet-woven drawstrings and a bunch of tassels to the pouch. | |
| category: /accessories | permanent link | |
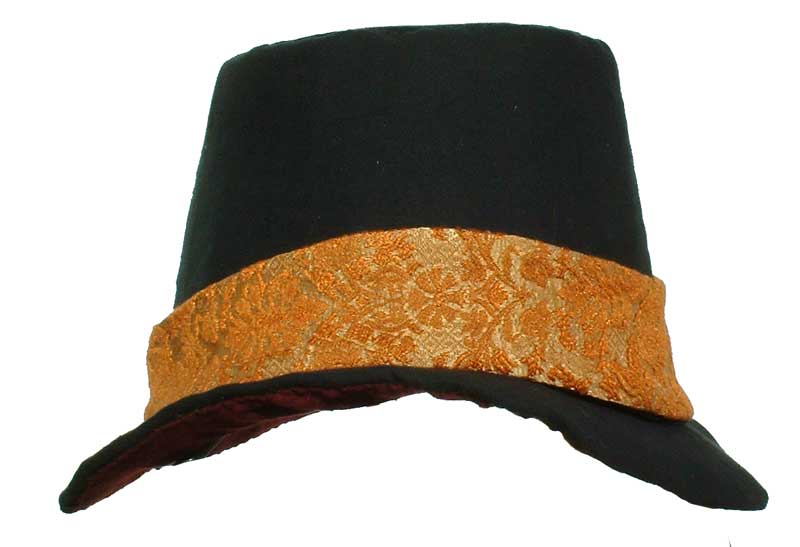
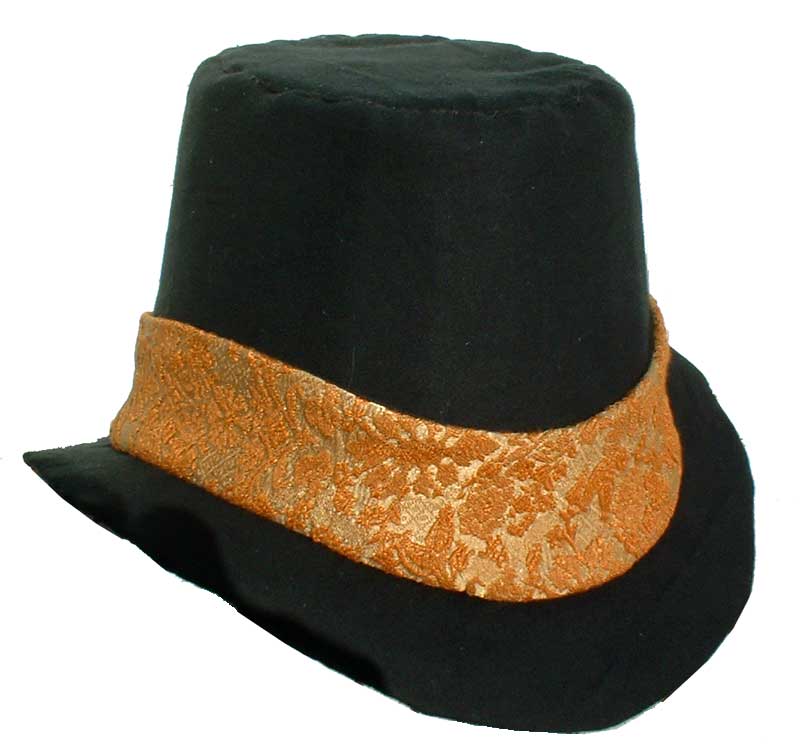
| Black Elizabethan Woman's Hat | |
|
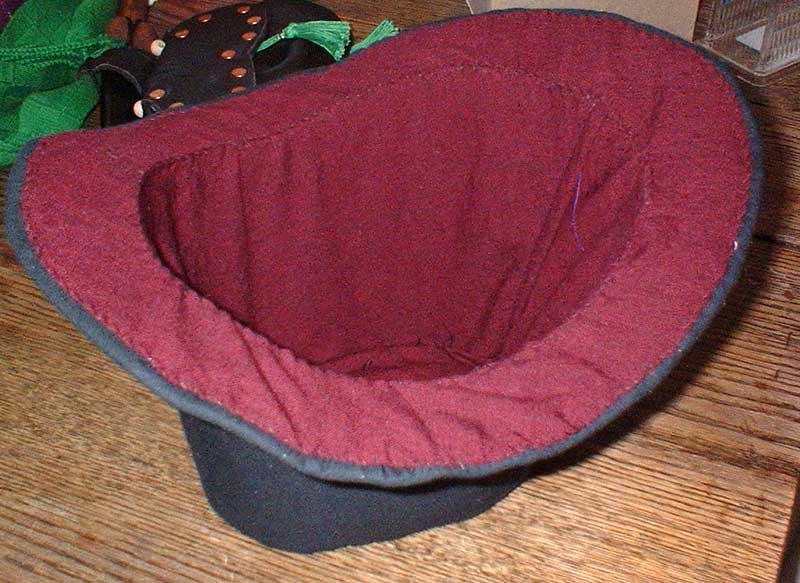
The outer shell of the hat is a lightweight, soft black cotton. Each section (crown, top, brim) was made as a single piece, covered with the black cotton, then whipstitched together. I added a piece of light gauge copper wire (for lack of any better wire on hand) to the brim about 1/4" in from the edge on the underside. The lining is burgundy linen reclaimed from some long-forgotten half-finished project. I sewed the crown and top of the lining together, tacked it in along the seam inside the crown of the hat (by far the most tedious part of the whole project), and whipped it down around the underside of the brim. Then I added the lining of the brim separately, stitching it first along the inside edge, then along the outside. The band is a bit of gold brocade reclaimed from another ancient garment I made about 10 years ago. It is cut to match the curve where the crown meets the brim. |
|
| category: /accessories | permanent link | |