| Lorenzo's Progress Log |
This is where I keep track of my sewing projects. Feel free to email me with any comments or questions.
- accessories - 6
- black - 27
- children - 1
- cioppa - 1
- cop - 8
- flemish - 34
- man - 14
- woman - 20
- giornea - 1
- italian - 4
- middle - 21
- misc - 9
- old - 1
- red - 4
- red_doublet - 1
- silver - 4
- tailor - 17

| Oct 30, 2005 |
| Daddy Needs A New Pair Of Shoes | |
|
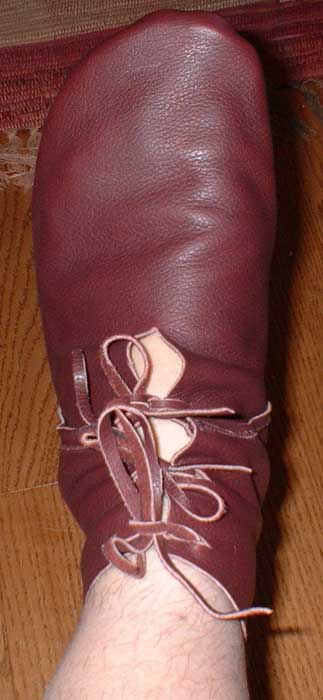
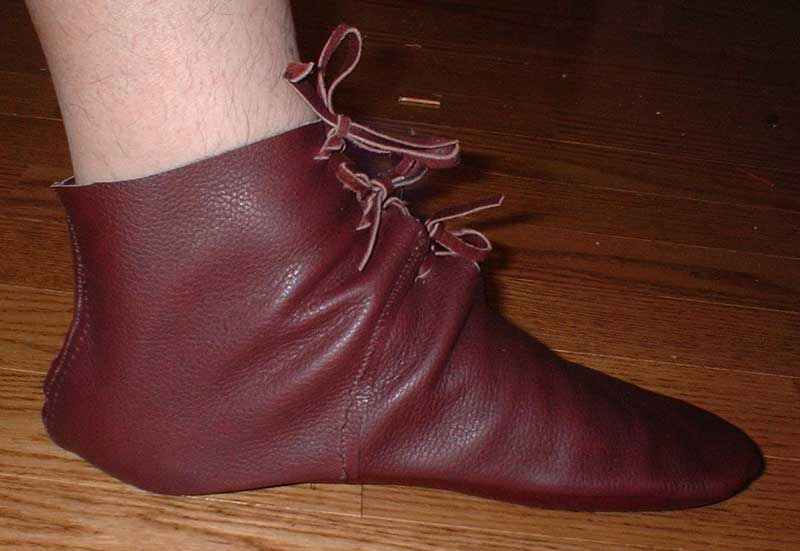
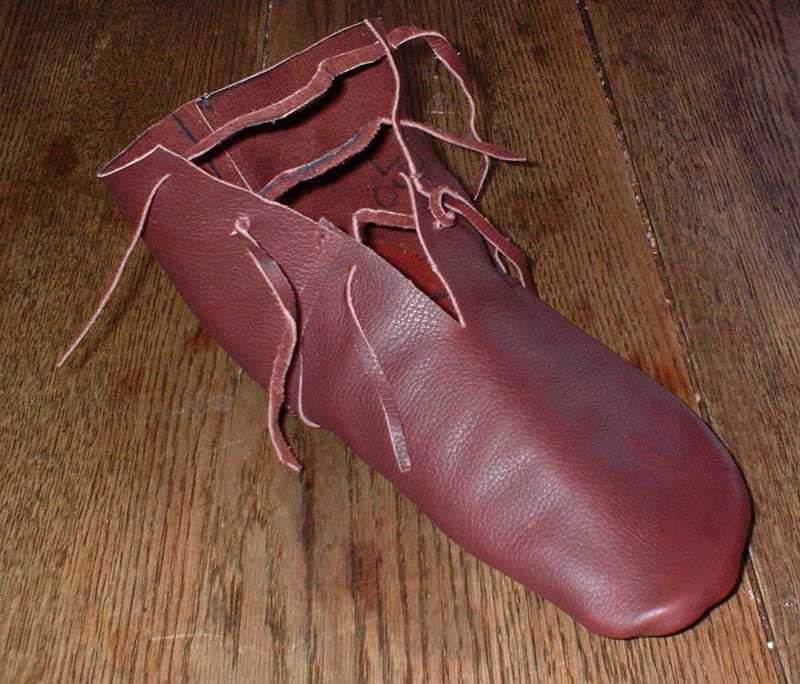
Following the success of my hose pattern, I got out the paper towels and duct tape to make a new pattern. I wanted to make an ankle boot this time, as I was always worried that the old shoes would fall off my heels. I added a rather generous seam allowance in all the appropriate places and cut out the leather. I used the same leather I had from the first pair of shoes, 8 oz. for the sole and 4 oz. for the uppers, both a nice burgundy color. The first time around I hand-stitched everything, which was the primary reason I hadn't tried making another pair for so long. After looking around for new shoes, I saw many that had lapped seams (rather than the fancy butted flesh-edge seams I would have preferred to have), so I figured that would be good enough for me. Since I wasn't supremely confident in my pattern, I did it all by machine so I wouldn't waste a lot of time on another disappointment. Much to my surprise, the shoes turned out just fine, and the rather ugly machine stitching doesn't look all that bad from normal viewing distance. I need to put insoles in them to keep my feet from complaining, and may glue on an extra sole to help them last a while longer.I also still have my old pattens that I can wear to keep them from getting torn up (I mostly worry about the heels, which is where my first pair died at). I didn't do any fancy closures, just a few pairs of slits with leather laces. I may whip out another pair later, and at least take the time to do the visible seams by hand, but for the most part I'm quite pleased with these. |
|
| category: /accessories | permanent link | |
| Oct 29, 2005 |
| A Pouch | |
|
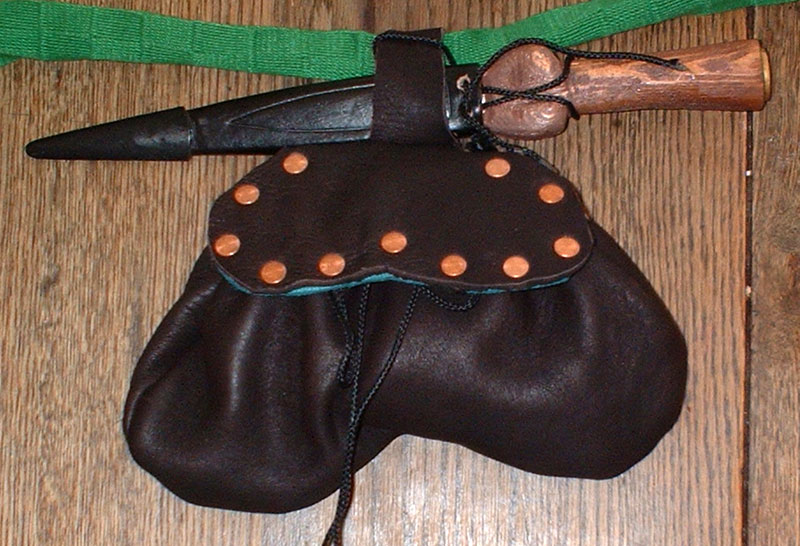
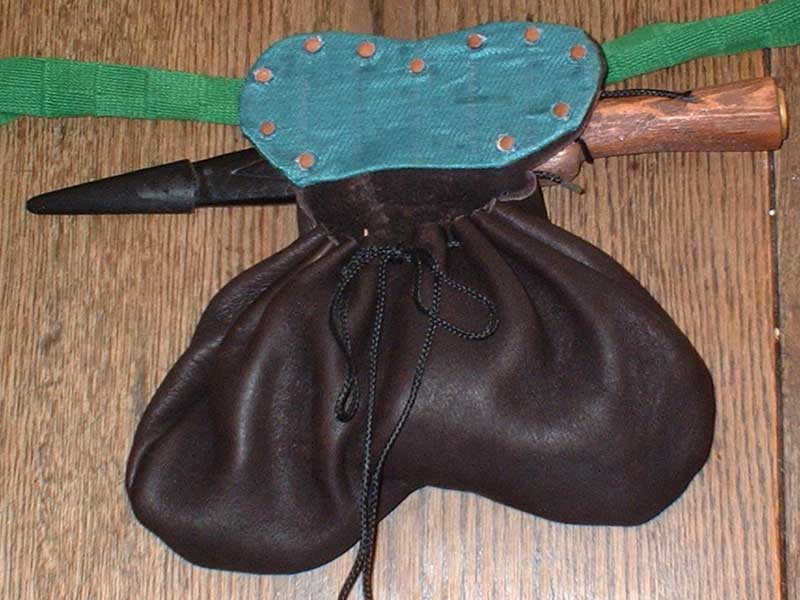
I've had a pile of elk hide lying around for years that I was originally planning to turn into a new pair of shoes. Fortunately my laziness on the shoe front was a good thing in this case, as I've been informed that elk hide is far too stretchy to make good shoes. It does, however, make perfectly dandy pouches. It's quite thick, while still being very soft and supple. I wanted to make a purse with a rigid flap, though I wasn't able to pull together the materials to make any sort of proper frame. Instead I cut a piece of scrap aluminum to the shape I wanted and glued some slik to it to cover it up. I riveted it to the flap of the pouch with some leftover copper rivets from the coat of pates I made a while back. The result is not entriely unattractive, though it's still a little rough. The body of the pouch is closed with a drawstring, which I plan to replace with a better cord than the one seen here. The loop is sewn to the back of the pouch, and is just about the right size for my dagger to sit in comfortably. I plan to add some tassels to the bottom edge of the pouch, but otherwise this is pretty much the finished product. |
|
| category: /accessories | permanent link | |
| Oct 17, 2005 |
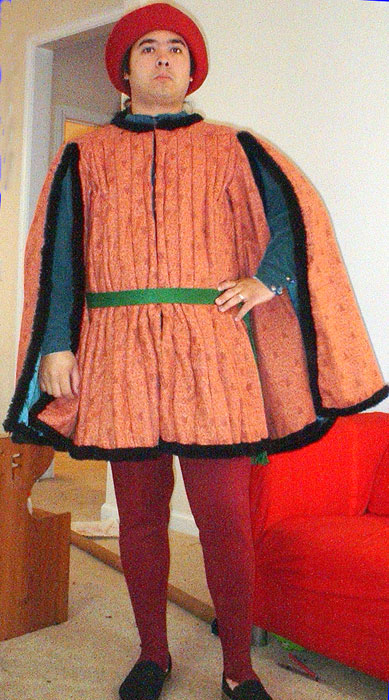
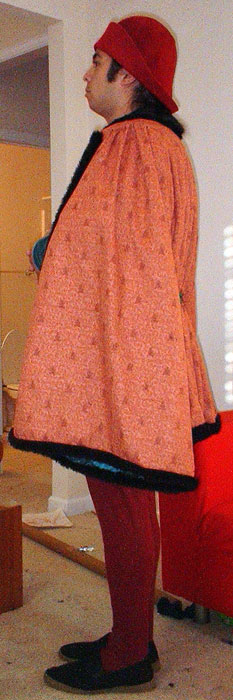
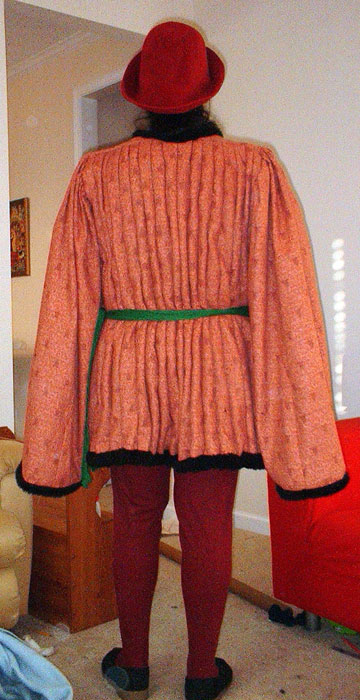
| An Orange Cioppa | |||
|
|||
| category: /cioppa | permanent link | |||
| Sep 22, 2005 |
| Success! | |
| I only got to wear the new doublet for about four hours yesterday, but it was incredibly comfortable. I was easily able to sit, slouch, and bend over without any problems. It was a little warm but the weather at the event was gorgeous, with ample shade and a lot of nice breezes. The main problem I had was worrying about getting it dirty. I'll definitely make another doublet with this design, though not necessarily in the very near future. | |
| category: /tailor | permanent link | |
| Doublet Finished | |
 Yesterday I attached the skirt and bound the bottom edge of the doublet with a strip of muslin. I had intended to make a separate lacing strip, but the bound doublet edge was wide enough to put lacing holes in so that's what I did. I made the holes to match this old pair of venetians, but I can add more if I need to. Yesterday I attached the skirt and bound the bottom edge of the doublet with a strip of muslin. I had intended to make a separate lacing strip, but the bound doublet edge was wide enough to put lacing holes in so that's what I did. I made the holes to match this old pair of venetians, but I can add more if I need to.
|
|
| category: /tailor | permanent link | |
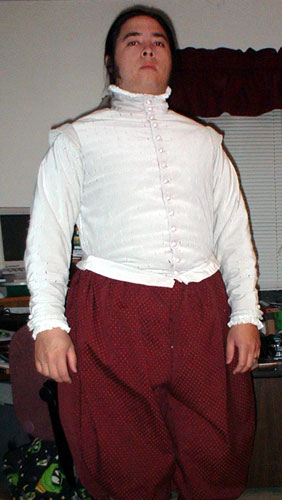
| Sleeves On | |
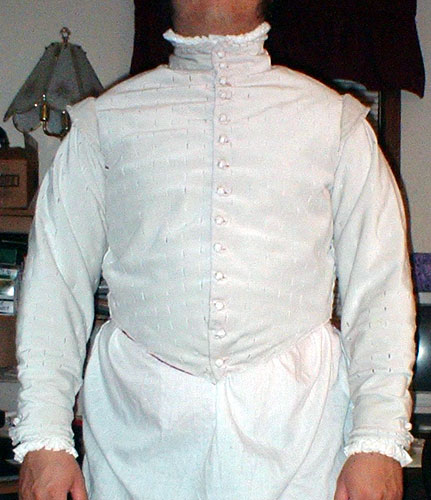 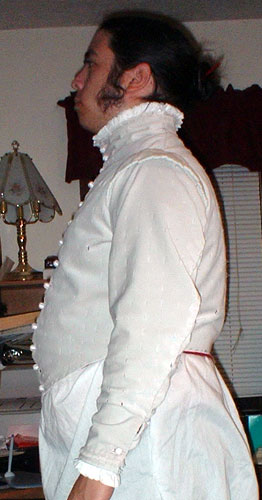 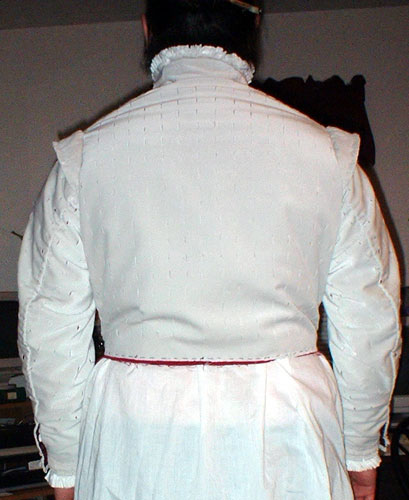 I got the sleeves built and attached, made the buttonholes and attached the buttons, and rebuilt an old shirt that had good cuffs and collar but was otherwise too big. The only problem I've found so far is some tightness in the shoulders. Unfortunately, it's impossible to know how the fit will be until everything is put together. You can see some stress wrinkles across the shoulder area, but it's not too bad. I may try putting in an underarm gusset to loosen things up a bit, but I'll wait until I wear it for a while before doing anything drastic. All that's left to do on the doublet is the skirt and the lacing strip, which I should be able to get done by this weekend. I should be able to wear it with an old pair of venetians to give it a good test run. I got the sleeves built and attached, made the buttonholes and attached the buttons, and rebuilt an old shirt that had good cuffs and collar but was otherwise too big. The only problem I've found so far is some tightness in the shoulders. Unfortunately, it's impossible to know how the fit will be until everything is put together. You can see some stress wrinkles across the shoulder area, but it's not too bad. I may try putting in an underarm gusset to loosen things up a bit, but I'll wait until I wear it for a while before doing anything drastic. All that's left to do on the doublet is the skirt and the lacing strip, which I should be able to get done by this weekend. I should be able to wear it with an old pair of venetians to give it a good test run.
|
|
| category: /tailor | permanent link | |
| Buttons | |
| I finished making the buttons tonight. I made twenty of them. I'm not sure exactly how many I'm going to use yet. I still haven't fully decided on how to close the sleeves, but buttons are sounding better and better to me. | |
| category: /tailor | permanent link | |
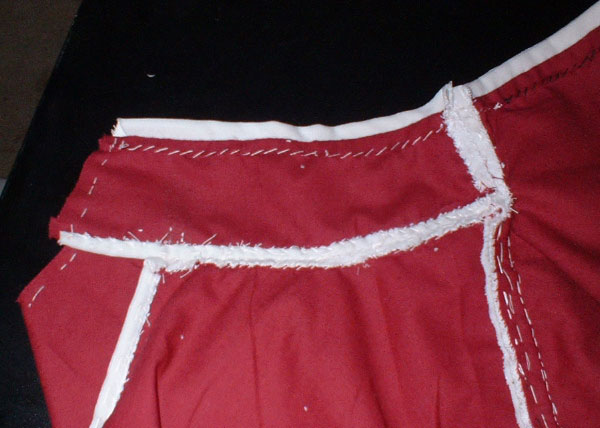
| Linings And Wings | |
|
Between last night and today I've put on both shoulder wings and the lining for the body and half of the collar. The wings were constructed as a simple fish shape, folded in half. I put a seam about 3/8" in from the folded edge for the little clipped loopy decoration, and quilted a layer of quilt batting into the rest of the wing. For the belly padding I ended up building up what I wanted out of several layers of quilt batting. at its thickest each pad is only about 5/8" thick. I stitched the layers together enough to hold everything in place and then sewed each pad onto the lining. I decided to use the same red cotton for the lining that I used to flatline the velveteen pieces. This thing is going to be somewhat warm, but it feels very sturdy and there are mo unsightly bulges on the front. After I finish the collar lining, next on the list will be the sleeves, then the skirt, binding the bottom edge, and the lacing strip. Somewhere in there I'll have to do buttons and buttonholes. The buttons are going to be thread covered like the others I've done, except with just a knot of thread at the top instead of another bead. I'm also going to do a few less buttons, to match the portrait. |
|
| category: /tailor | permanent link | |
| Coming Together | |
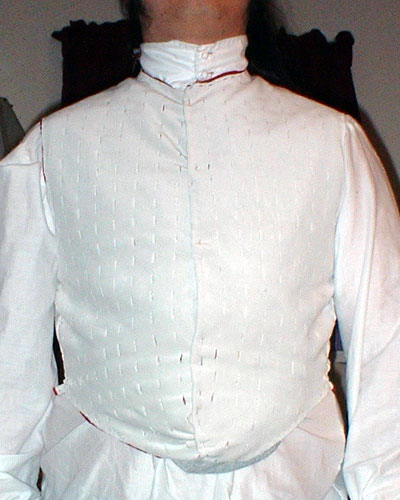 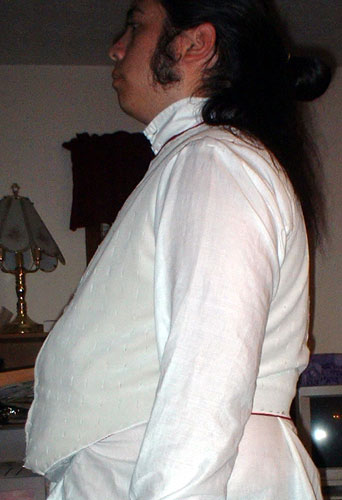  The pinking went quickly and easily, and cleaning up the stray threads didn't take much time either. I cut the lining for the body out of the red cotton I plan to use for the lining of the trunk hose. After flatlining all the pieces, I basted the body together and turned under the center front edges. In the pictures the front is pinned and padded with a t-shirt, so it's a little lumpy. All things considered, however, I'm pretty happy with it so far. Pinking takes a lot less time than couching cord, though it is less forgiving of mistakes. I plan to crate pads for the peascod similar to how I did for the black suit, but with a few changes. I'm going to make the pads as entirely separate entities and then attach them to the lining of the doublet. I'm trying to avoid the outline of the padded area that can be seen on the black suit. Also, the pads are going to be asymmetrical. The pad on the buttonhole side is going to stop short of the buttonholes, while the pad on the button side is going to go out past the edge of the doublet so it can fill in the entire area under the buttons. I was not very happy with the dead area under the buttons on the last doublet. Also, I wonder if the black linen wasn't really heavy enough to mask the contours of what was going on under it. The pinking went quickly and easily, and cleaning up the stray threads didn't take much time either. I cut the lining for the body out of the red cotton I plan to use for the lining of the trunk hose. After flatlining all the pieces, I basted the body together and turned under the center front edges. In the pictures the front is pinned and padded with a t-shirt, so it's a little lumpy. All things considered, however, I'm pretty happy with it so far. Pinking takes a lot less time than couching cord, though it is less forgiving of mistakes. I plan to crate pads for the peascod similar to how I did for the black suit, but with a few changes. I'm going to make the pads as entirely separate entities and then attach them to the lining of the doublet. I'm trying to avoid the outline of the padded area that can be seen on the black suit. Also, the pads are going to be asymmetrical. The pad on the buttonhole side is going to stop short of the buttonholes, while the pad on the button side is going to go out past the edge of the doublet so it can fill in the entire area under the buttons. I was not very happy with the dead area under the buttons on the last doublet. Also, I wonder if the black linen wasn't really heavy enough to mask the contours of what was going on under it.
|
|
| category: /tailor | permanent link | |
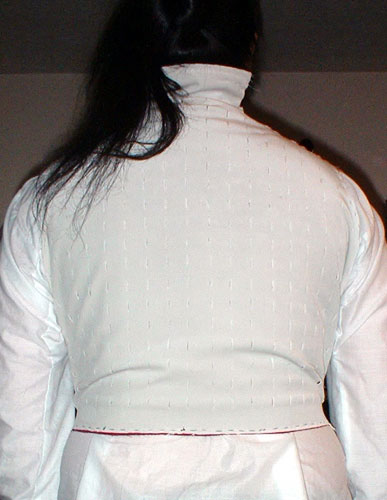
| Collar Quandary | |
 Last night I went to put the collar on. First I tried to be lazy and not flatline it, which turned out to be an unsightly mistake. Also, the rectangular shape that had looked fine on the mockup didn't work very well on the real thing. I changed the front collar pieces to a slightly curved shape. Finally, I wrestled with attaching it using normal techniques, which was a nightmare. I ended up finishing all the edges, butting them together, and whipstitching everything. It turned out much nicer that way. Last night I went to put the collar on. First I tried to be lazy and not flatline it, which turned out to be an unsightly mistake. Also, the rectangular shape that had looked fine on the mockup didn't work very well on the real thing. I changed the front collar pieces to a slightly curved shape. Finally, I wrestled with attaching it using normal techniques, which was a nightmare. I ended up finishing all the edges, butting them together, and whipstitching everything. It turned out much nicer that way.
|
|
| category: /tailor | permanent link | |