| Lorenzo's Progress Log |
This is where I keep track of my sewing projects. Feel free to email me with any comments or questions.
- accessories - 6
- black - 27
- children - 1
- cioppa - 1
- cop - 8
- flemish - 34
- man - 14
- woman - 20
- giornea - 1
- italian - 4
- middle - 21
- misc - 9
- old - 1
- red - 4
- red_doublet - 1
- silver - 4
- tailor - 17

| Sep 22, 2005 |
| Pourpoint: Mostly Finished | |||
|
|||
| category: /cop | permanent link | |||
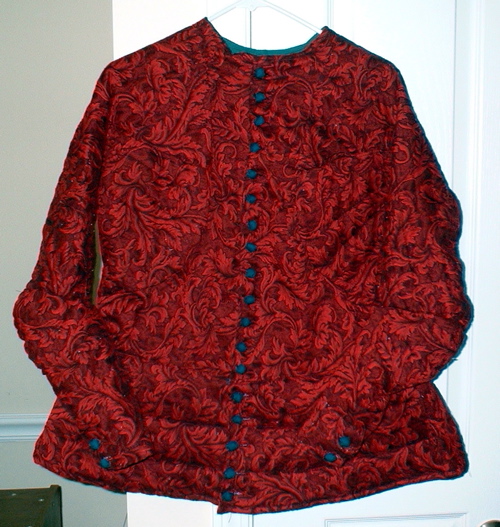
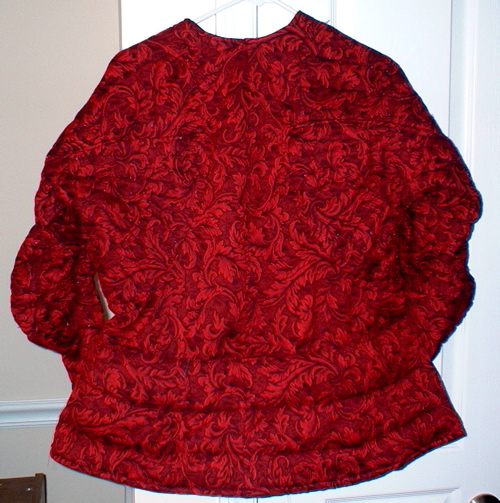
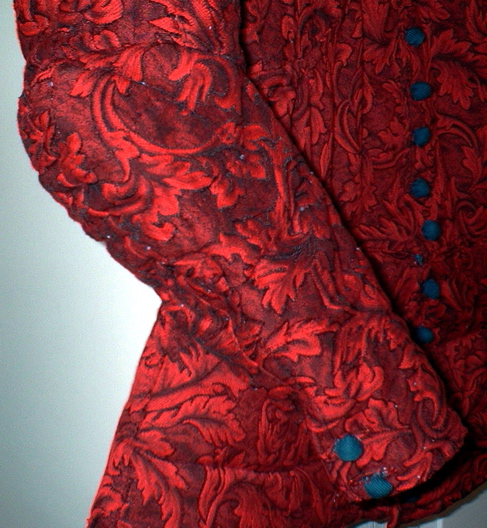
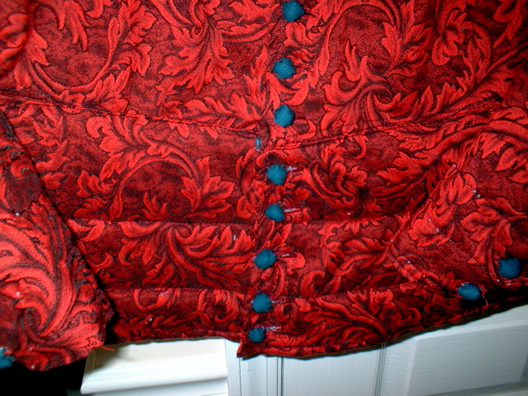
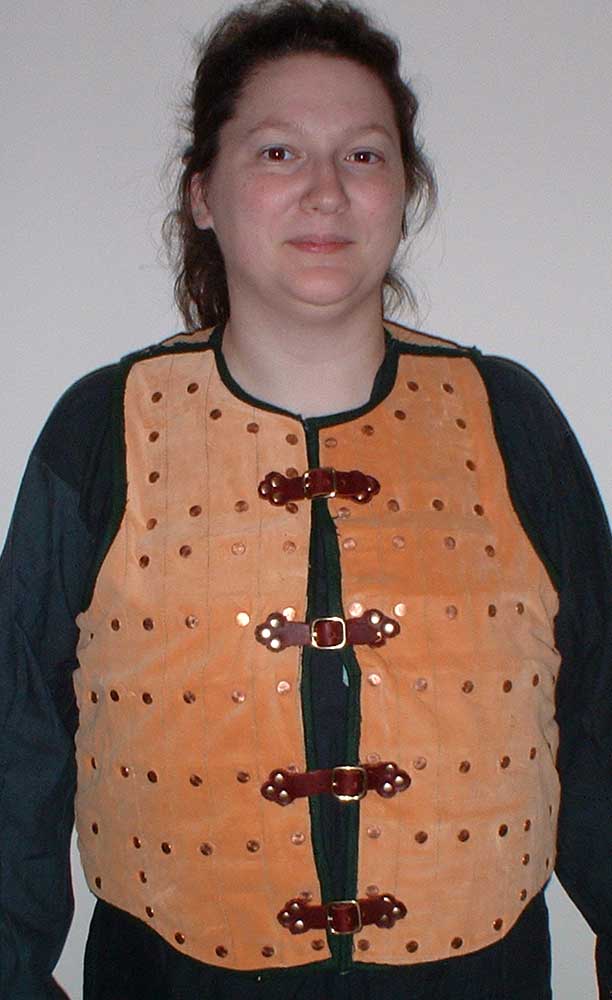
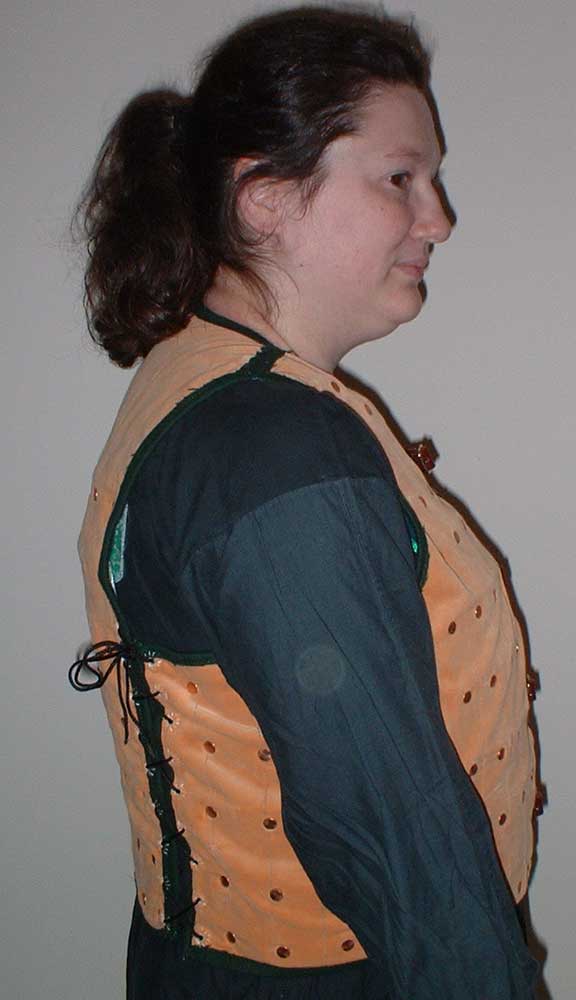
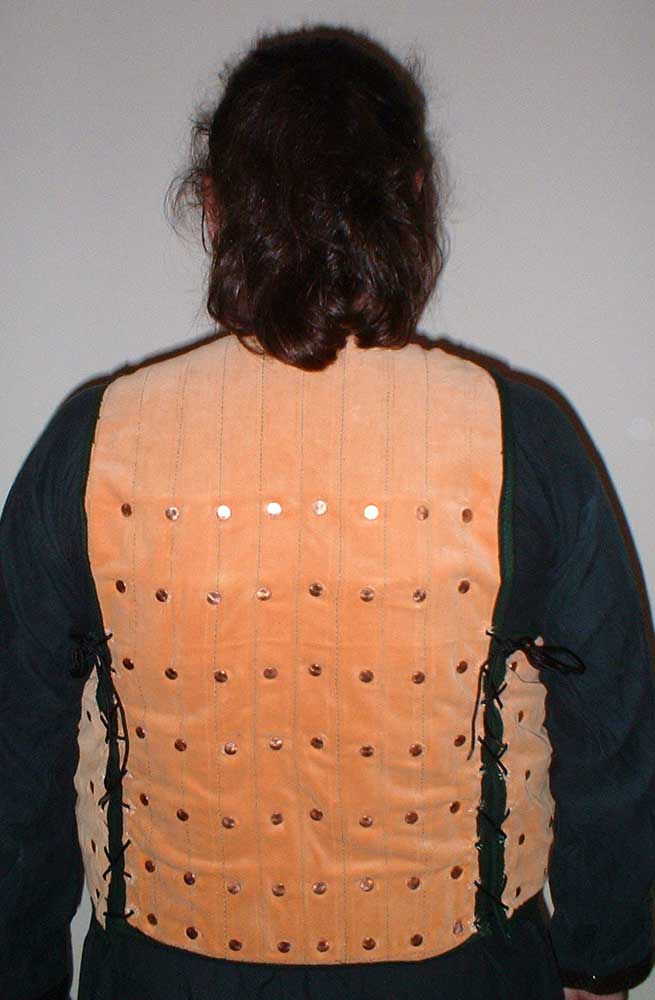
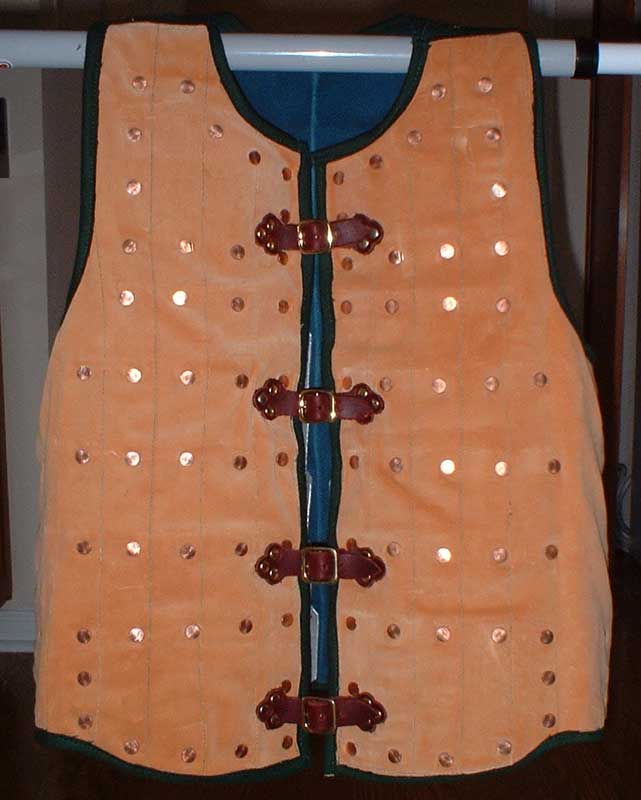
| Pourpoint and Coat of Plates: Finished | |
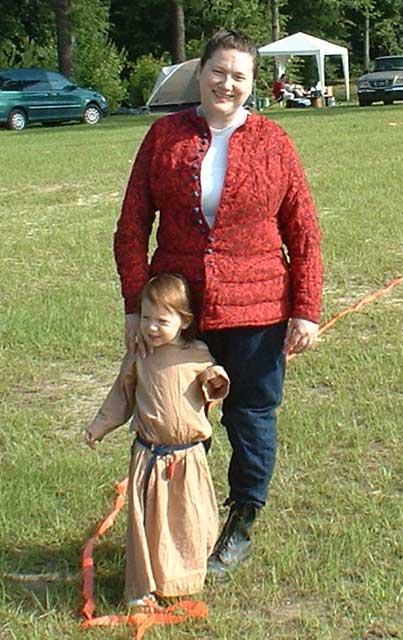
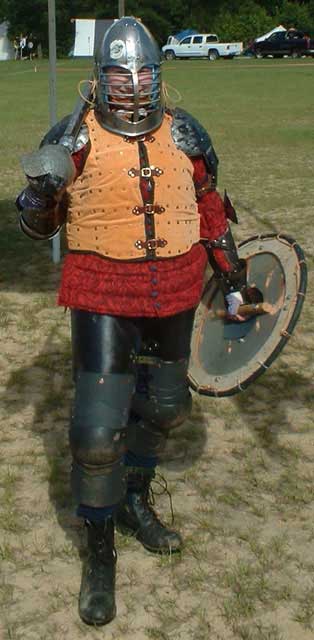
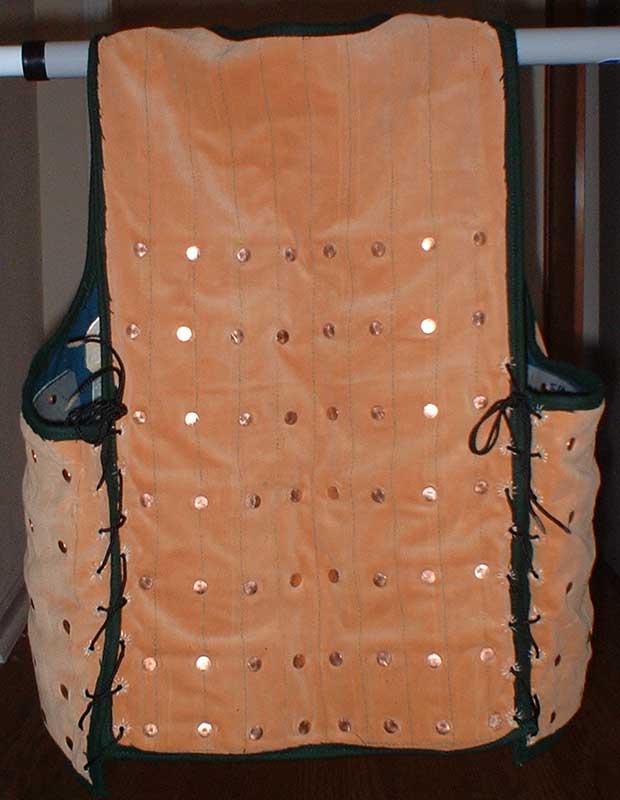
| First off, pictures of the pourpoint worn alone and with the armor. Everything seemed to work fine, though it was reportedly pretty warm in there. There was some wear at the corners of a few of the plates, though that may have just been pile being worn down. Hopefully there won't be any major holes for a while. | |
| category: /cop | permanent link | |
| Pourpoint: Patterning | |
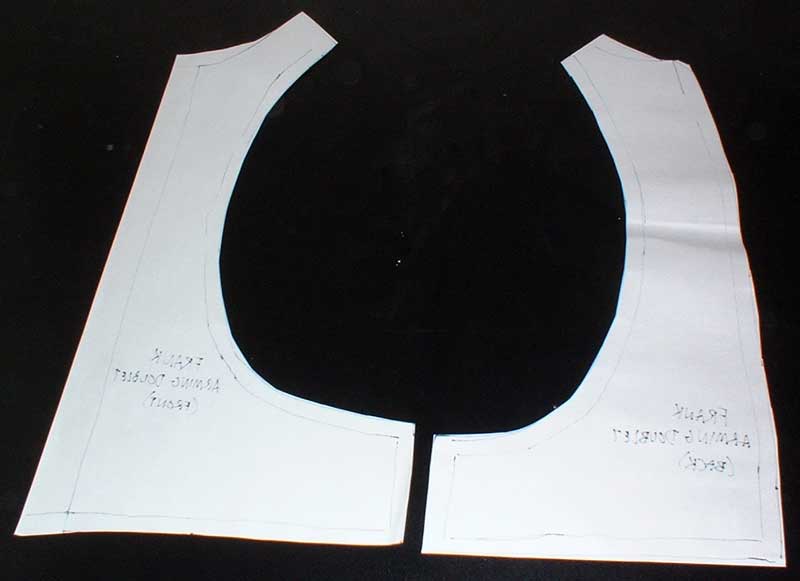 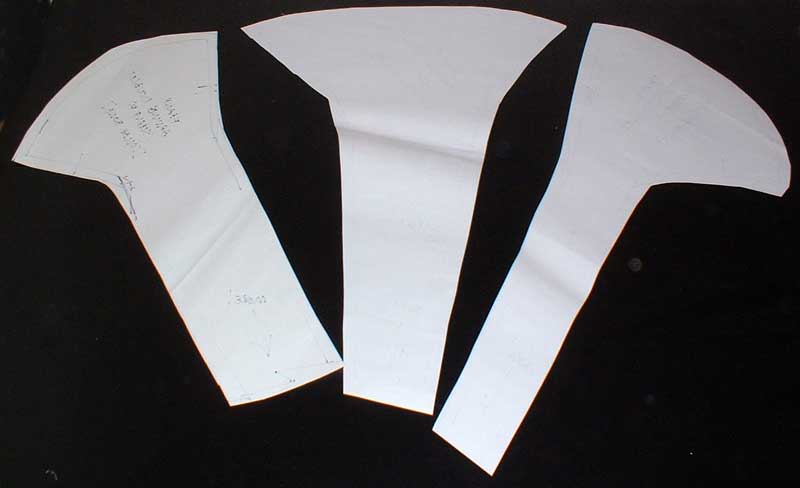 The original plan was to simply reinforce the old ugly tunic with some padding so I could keep the padded skirt, but the more I thought about it the less I liked the idea. So I started patterning a proper pourpoint. I made a duct tape pattern, drawing out the grandes assiettes armscye with a seam under the arm and a seam at the back of the arm. I've assembled the lining already and it seems quite promising. The sleeves will be padded all the way through the elbow, so I can do away with ugly elbow pads. The padding will be cut from cheap bath towels acquired at Big Lots for $2.99 each. I will also add a shorter padded skirt to the bottom, with lacing holes to attach the new legs once I build them. The original plan was to simply reinforce the old ugly tunic with some padding so I could keep the padded skirt, but the more I thought about it the less I liked the idea. So I started patterning a proper pourpoint. I made a duct tape pattern, drawing out the grandes assiettes armscye with a seam under the arm and a seam at the back of the arm. I've assembled the lining already and it seems quite promising. The sleeves will be padded all the way through the elbow, so I can do away with ugly elbow pads. The padding will be cut from cheap bath towels acquired at Big Lots for $2.99 each. I will also add a shorter padded skirt to the bottom, with lacing holes to attach the new legs once I build them.
|
|
| category: /cop | permanent link | |
| Coat of Plates: Fitting | |
   I was quite pleased with the fit, though I had expected the plates to take up more room. The sides laced completely closed, which means there's not much room for adjustment to make it any tighter. However, it also means that there's plenty of room for padding in the gambeson. I was quite pleased with the fit, though I had expected the plates to take up more room. The sides laced completely closed, which means there's not much room for adjustment to make it any tighter. However, it also means that there's plenty of room for padding in the gambeson.
|
|
| category: /cop | permanent link | |
| Coat of Plates: Almost Finished | |
  I finished putting all the plates in, attached the straps, sewed up the shoulders, and laced the sides. Hopefully I'll be able to get a fitting done tonight and see if it actually works. I managed to squeeze into it myself and it felt quite comfortable, even though it didn't really fit right. I finished putting all the plates in, attached the straps, sewed up the shoulders, and laced the sides. Hopefully I'll be able to get a fitting done tonight and see if it actually works. I managed to squeeze into it myself and it felt quite comfortable, even though it didn't really fit right.
|
|
| category: /cop | permanent link | |
| Coat of Plates: Pictures | |
  I finally found the camera, so here are a couple pictures of the progress so far. I finally found the camera, so here are a couple pictures of the progress so far.
|
|
| category: /cop | permanent link | |
| Coat of Plates: Patterning | |
|
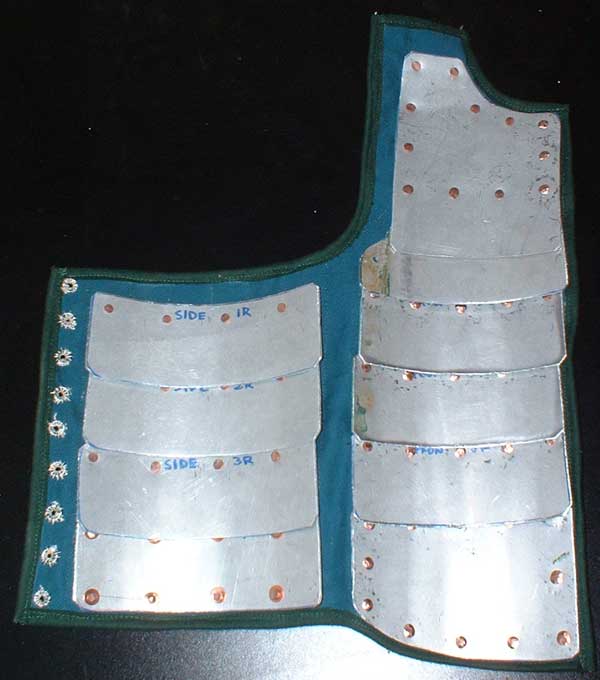
It's been a long time since I've had anything to post here. Almost a year, it looks like. I never got any further on the trunk hose I was working on when last I was sewing, but maybe I'll get back to them later. My current project is new body armor for my wife, which I have been promising her for years. I've decided to make a coat of plates, as it's quite simple construction-wise, protective, and comfortable. I got on a roll last night and drafted the pattern, cut all the fabric, and patterned, cut, filed, and drilled all the plates. While not exactly a period design, I think this should come close enough. It will buckle up the front for convenience, with laces at the side back for adjustment. The outer layer is the orange cotton velveteen I dyed way back when. The inner layer is a turquoise cotton denim. I plan to put the two layers together, topstitch them enough to keep them from sliding around when I'm riveting the plates, and bind the edges in red. I haven't decided if I'm going to get bias tape or just cut a straight strip of something from the fabric stash. I'm leaning toward the latter, just because I'm cheap. The shoulder seams will be butted together, which means I will be able to attach all the plates on flat pieces, then sew up the shoulders and lace the back. The lacing holes will be reinforced with metal rings. I'm going to be using the machine for everything but the lacing holes, which will be done by hand because big grommets are ugly. My main concern so far is that the whole thing will end up being too small once the plates go in. I'm expecting a sizeable gap at the laces, but that will allow for weight fluctuation without running out af adjustment space. I'll be using galvanized roofing nails with washers to attach the plates. The plates themselves are aluminum, and I was pleasantly surprised that I could cut them all from the one intact street sign I had in the garage. |
|
| category: /cop | permanent link | |
| Coat of Plates: Taking Shape | |
|
I've gotten a chance to work on this project again, and it's going pretty well. Roofing nails are cheap, but the nippers I got were nowhere near sufficient to cut them down. I went ahead and ordered two pounds of 3/16" diameter copper rivets from McMaster-Carr, which is by far the largest expenditure so far (about $20). They fit the holes I drilled in the plates just right, and go through the holes made by my awl with just a little finessing. I started out peening them over, but eventually I decided to just whack them flat with a two pound sledge. The ends flatten out into nice cylinders with much rounder edges than the peened rivets. I'm hoping the fabric survives well, because it'll be darn near impossible to get the rivets out of the plates to re-use them. The two layers of the fabric shell were sewn together with a series of vertical stitches about 2" apart. I started out trying to measure them, but after a while I was able to eyeball them without much trouble. I bound the edges with the fulled green wool that I still haven't run out of. The eyelets are reinforced with steel rings and bound with white silk thread. Not the most attractive eyelets in the world, but hopefully they'll hold up well. They won't be laced and unlaced very often, so mostly I just don't want them to rip out from general strain. I've got about half of them done so far. By far the most nerve-wracking part so far was when I finished binding the eyelets on one of the front sections and started putting in the plates. I had test-fitted the fabric shell by itself, and the edges met at the front and the side openings with a little room left, so I'm not too worried about the plates making it too small. Still, I had no guarantee that the plates I'd designed would really work. Fortunately, I got all the plates in with no problems, though I had to trim the side plates down by about 3/4". The copper rivets are sturdy, and setting them is hard on my poor out of shape arms. I experimented on one of the side plates with some copper burr rivets I found in the shop, but they actually ended up ebing harder to set, since I had to trim them to length. There's very little visual difference on the outside from the other rivets, so I don't think anyone will notice. Now it's just more of the same until I get all the plates in. Then I sew up the shoulders, add straps and buckles, and put in some leather-reinforced holes for attaching spaulders. |
|
| category: /cop | permanent link | |